Overview
Submit data to permitted facilities for automated processing in EQuIS Enterprise with the EQuIS Data Processor (EDP). Enterprise EDP checks submitted data against the business rules of the selected EDD format, the EQuIS database’s reference values, and the existing data in the EQuIS database. If the data passes all of these checks, it is automatically loaded into the EQuIS database and available for reporting. If the data does not pass these checks, the data provider and the administrator receive notifications of errors as appropriate.
Exercise Scenario
One of our laboratories has completed their analysis of some samples and has produced an EDD of the results from their LIMS. Our automatic email submittal has not yet been set up. Therefore, they have sent the EDD to us to upload manually into EQuIS Enterprise. The laboratory has also requested our latest "EDD Specifications" to ensure their LIMS is up-to-date. We will generate the specifications they require in EQuIS Enterprise EDP.
|
EQuIS data providers upload EDDs directly into an EQuIS database. |
|
Exercise Objectives |
•Upload EDDs with Enterprise EDP
•Review Accepted and Rejected EDDs
Skills, Software and Permissions Required
•Google Chrome, Mozilla Firefox, or Microsoft Edge must be installed on the workstation
•Creator permissions to the EDDs object type in EQuIS Enterprise
•Editor permissions to the desired facilities
|
Objective: Upload EDDs with Enterprise EDP |
Tasks
•Login to EQuIS Enterprise
•Generate a New Reference Values File
•Sign and Submit the File
•Upload EDDs with EQuIS Enterprise EDP
Login to EQuIS Enterprise
1.Open an Internet browser.
2.Enter the Enterprise URL in the address bar.
For this exercise, enter in the Enterprise URL provided by the EarthSoft Training Department.
3.If required, enter the Username and Password on the EQuIS Enterprise Login page and then select Login.
For this exercise, enter in the credentials provided by the EarthSoft Training Department.
4.On the right side of the top of the EQuIS Enterprise frame, the Session Facility Chooser is indicated with the facility ![]() icon or the facility group
icon or the facility group ![]() icon. Click the facility name or the facility
icon. Click the facility name or the facility ![]() icon on the current dashboard header to open the Facility Chooser and then connect to the desired facility.
icon on the current dashboard header to open the Facility Chooser and then connect to the desired facility.
For this exercise, choose the North America folder and then the Gold King Mine facility.
5.Select More Options ![]() on the right-side of the dashboard header to open a drop-down menu. Click
on the right-side of the dashboard header to open a drop-down menu. Click ![]() Choose Dashboard from the drop-down options to open the Dashboard Chooser.
Choose Dashboard from the drop-down options to open the Dashboard Chooser.

6.Browse to the desired Dashboard that has an EDP EDD Upload widget on it.
For this exercise, single-click on the EDP Dashboard. Note the EDP EDD Upload widget on the right.
Generate a New Reference Values File and Other EDD Specification Files
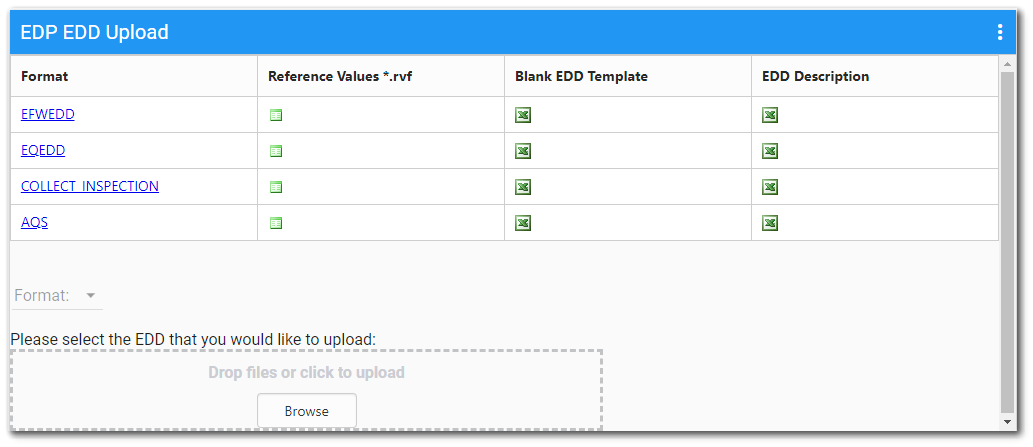
To properly export data from their LIMS (i.e., generate EDDs) in the desired format, the data provider may request the “specifications” of the EQuIS format. The Reference Values file, the Blank EDD Template file and the EDD Description file provide the necessary EQuIS database specifications to ensure proper upload of data.
The Blank EDD tool creates an empty Excel template that follows the format file’s specific layout for data entry. The EDD Description tool defines the specifications of the format. These tools are very useful references and may be incorporated into broader Standard Operating Procedures. See this article for additional information on both tools.
1.From the EQuIS Formats listed on the EDP EDD Upload widget, find the desired format and select Reference Values (*.rvf) ![]() in that line.
in that line.
For this exercise, create a reference value file for the EQEDD format.
2.When the reference values file downloads, save the new .rvf in the same location as the previously saved .rvf with the same name, overwriting the old .rvf. EDDs should always be created and uploaded using the most recent reference values.
3.From the EDD formats listed on the EDP EDD Upload widget, find the desired format and select Blank EDD Template ![]() in that line.
in that line.
For this exercise, create a blank EDD template file for the EQEDD format.
|
When selecting the Blank EDD Template |
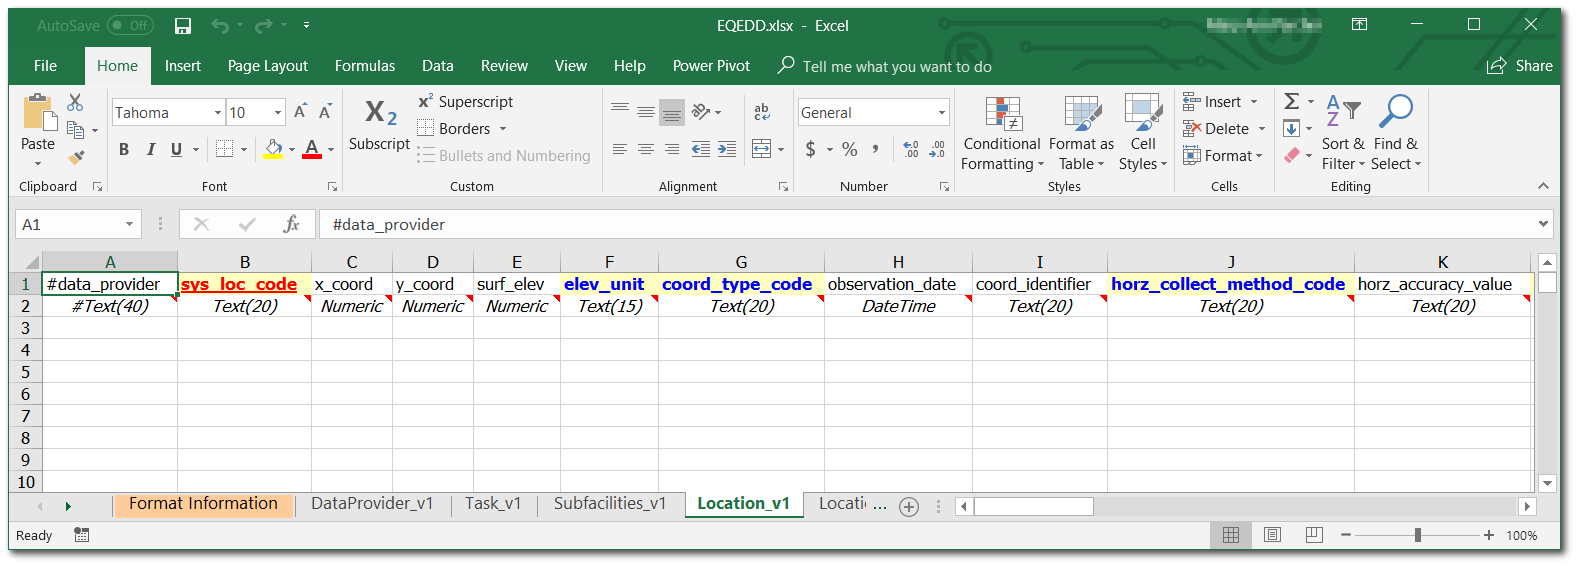
4.When the blank EDD file downloads, save the new file to the desired directory. A Microsoft Excel file is created with the format columns and field types, along with the color-coding as displayed in EDP to indicate required fields, primary keys, and look-up values. Separate worksheets are named for each section of the format file.
5.From the EDD formats listed on the EDP EDD Upload widget, find the desired format and select EDD Description ![]() in that line.
in that line.
For this exercise, create an EDD description file for the EQEDD format.
6.When the EDD description file downloads, save the new file to the desired directory. By default, the EDD description will be named after the EDD format (for example, "EQEDD.xls"), similar to the blank EDD template file. Change the filename of the EDD description to avoid saving over the blank EDD template file.
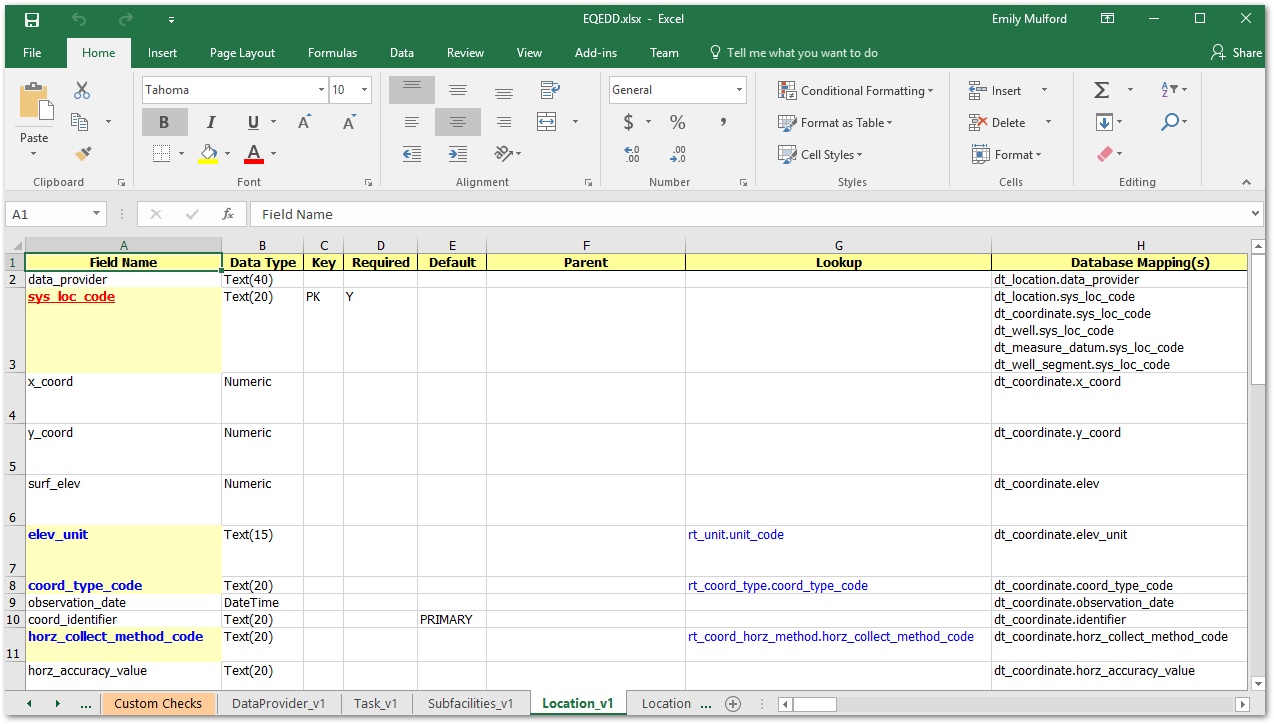
Information about the currently loaded format file (EQEDD) is exported into a Microsoft Excel spreadsheet, including whether a field is a primary key (i.e., required), data type, related look-up tables, and EQuIS Schema mapping. The description includes a separate worksheet detailing each section of the EDD format file.
Sign and Submit the EDD
If the EDD has not already been zipped up, signed and saved, see Create EDP Packages with EDP Standalone for the steps to complete this task.
Upload EDDs with EQuIS Enterprise EDP
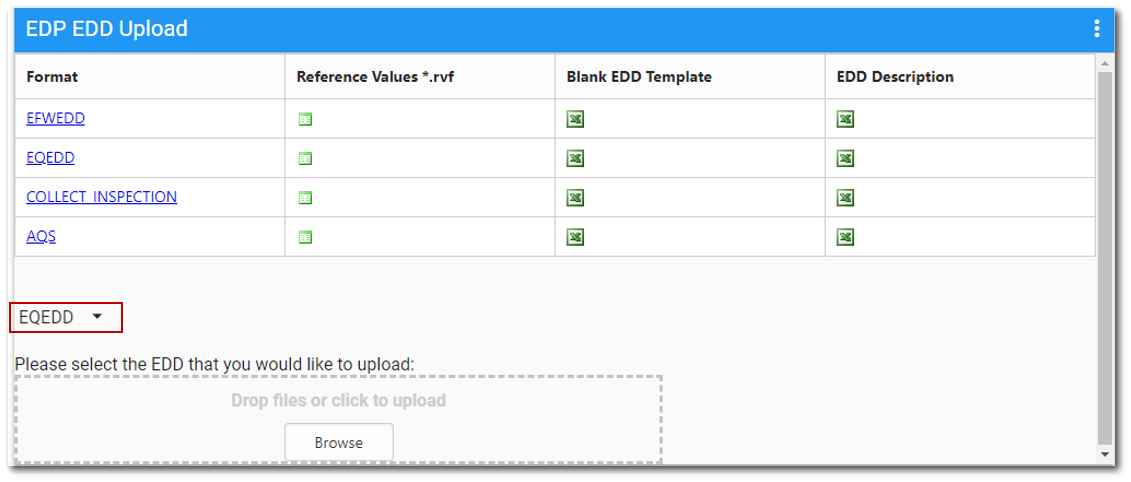
1.From the EDP EDD Upload widget, select the EQuIS Format.
For this exercise, select the EQEDD format.
2.Click the Browse button to select the desired EDD file.
For this exercise, select the EDD package created in the Check EDDs-EDP Standalone exercise or select the "20160825 103913.GKM.EQEDD.zip" file from the Training Materials> EDP Materials folder.
3.Select the Upload button. Please note that it may take 15 to 20 minutes for the file to process.
|
Objective: Review Submitted Data |
The Enterprise EDP EDD Status widget displays information about EDDs submitted and processed by EQuIS Enterprise EDP. Users with Viewer permissions to a facility and to EDDs will see all EDDs processed by EQuIS Enterprise EDP. Otherwise, users will only see EDDs that they have submitted.
Tasks
•Review the Status of EDDs
•Download EDDs from the EDP EDD Status Widget
Review the Status of EDDs
1.On the EDP Dashboard, find the EDP EDD Status widget. The Status will show three green lights if the EDD successfully passed all three operations performed by EQuIS Enterprise EDP. If the EDD did not successfully pass all three operations, the Status column displays some combination of red and green lights.

2.Expand the Status column of the EDD Status widget for a rejected EDD to review the EDD package and its status.
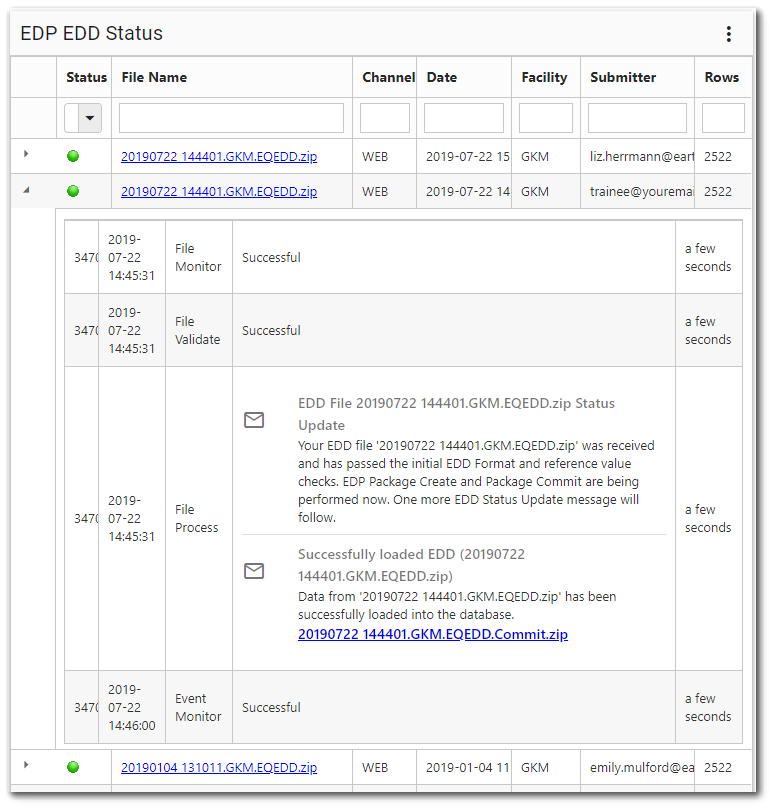
3.Click on the "...Errors.zip" file at the bottom of the expanded status to download the error log.
Download EDDs from the EDP EDD Status Widget
Any EDD can be downloaded by single-clicking on the EDD name.
1.Single-click on the name of the desired EDD package in the EDD Status widget.
2.Select to Save or Open the file, depending on the browser.