Overview
Location Groups allow reports to return results for several locations concurrently, providing the flexibility of including one location in more than one location group. Analyte Groups allow reports to return results for several analytes concurrently. Use Action Levels to compare data to defined cleanup criteria or other levels of importance.
Exercise Scenario
To facilitate data analysis, we want to build location and analyte groups and set up action levels to compare to our data.
|
Learn how to group data and establish action levels to facilitate reporting and analysis. |
|
Exercise Objectives |
•Create Location Groups
•Build Analyte Groups
•Set Up Action Levels
Skills, Software and Permissions Required
•EQuIS Professional 7 must be installed on the workstation with the EQuIS Library feature turned on
•.NET Framework 4.7.2 or higher must be installed on the workstation
•Read permissions to the desired facilities are required
•Write permissions to the desired facilities are required to save groups and action levels
|
Objective: Create Location Groups |
1.If necessary, reconnect to the EQuIS Training Database used in the previous exercise.
2.Select Groups ![]() located in the Edit group of the Home ribbon.
located in the Edit group of the Home ribbon.
3.Single-click on the Location group type to highlight it.
4.Select New> New Group.
5.Enter the desired Group Code on the Group Details tab.
For this exercise, enter “Utah <your initials>” in the Group Code.
6.Select the Save button to enable the other fields on the Group Details tab. Notice that the new Group has been added under Location on the Group Type pane.
7.Add additional information for the new Location Group as desired. The following table describes the available fields.
Field |
Description |
|---|---|
CODE |
Unique identifier for the group. Will be displayed in Reports when selecting parameters. |
TYPE |
Type of group, typically pre-populated by selecting the group type when creating a new group. |
DESCRIPTION |
Description of the group. |
FACILITY_ID |
Group will only be available in the specific facility, if populated. (If this field is left blank, the group will be available across all facilities.) |
DATE |
Date in which the group was created. |
OWNER |
Person who created the group. |
STATUS_FLAG |
Defaults to A (for Active). STATUS_FLAG determines whether a reference value (or group) is available for use in EDP. |
REMARK |
Any additional remarks or details about the group. |
8.Select the Group Members tab.
9.In the Available Members pane at the bottom of the workspace, press and hold the Shift key and click the first item in the list and the last item in the list to group select the full list of visible members.
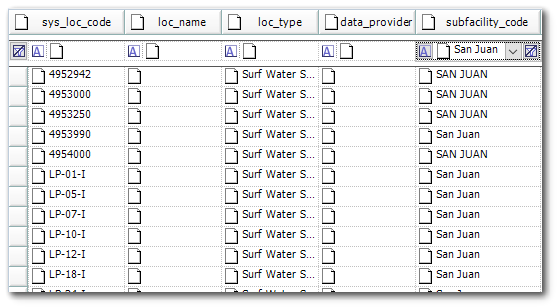
For this exercise, filter SUBFACILITY_CODE for "San Juan" and select all the listed locations.
10.Right-click the locations and select Add Members to add the selected locations to the location group.
|
Change the reporting order of the group members by highlighting a member and moving the member’s position with the up and down arrow keys on the keyboard. |
11.Click the Save ![]() icon on the Groups window toolbar to save the group information.
icon on the Groups window toolbar to save the group information.
12.Note the asterisk * adjacent to the Groups window tab disappears, indicating that the data was saved.
|
Objective: Build Analyte Groups |
Create analyte groups to quickly build and run a report for multiple analytes.
1.If the Group window is not still open, select Groups ![]() located in the Edit group of the Home ribbon.
located in the Edit group of the Home ribbon.
2.Single-click on the Analyte group type to highlight it.
3.Select New> New Group.
4.Enter in the desired Code of the new group in the Group Details tab.
For this exercise, enter “Irrigation Waters <your initials>” in the Code field of the Group Details pane
5.Select the Save button to enable the other fields on the Group Details tab. Notice that the new group has been added under Analyte on the Group Type pane.
6.Add additional information for the new analyte group as desired. The following table describes the available fields.
Field |
Description |
|---|---|
CODE |
Unique identifier for the group. Will be displayed in Reports when selecting parameters. |
TYPE |
Type of group, typically pre-populated by selecting the group type when creating a new group. |
DESCRIPTION |
Description of the group. |
FACILITY_ID |
Group will only be available in the specific facility, if populated. (If this field is left blank, the group will be available across all facilities.) |
DATE |
Date in which the group was created. |
OWNER |
Person who created the group. |
STATUS_FLAG |
Defaults to A (for Active). STATUS_FLAG determines whether a reference value (or Group) is available for use |
SHORT_NAME |
Abbreviated name of the group. |
METHOD_YN |
Y = Cannot add the same analyte (based on the CAS_RN) multiple times. |
N = The same analyte (based on the CAS_RN) will be allowed to be entered multiple times. |
|
REMARK |
Any additional remarks or details about the group. |
|
Setting METHOD_YN = N is useful if analyzing the same analyte for both Total (T) and Dissolved (D) tests. |
7.Select the Group Members tab.
8.From the Available Members pane, press and hold the CTRL key to select multiple analytes to be included in the analyte group. Note that clicking on the CHEMICAL_NAME field header will sort the analytes in either ascending or descending alphabetical order.
For this exercise, select aluminum, arsenic, cadmium, chromium, cobalt, copper, iron, lead, manganese, mercury, molybdenum, nickle, selenium, vanadium, and zinc.
9.Right-click on the last analyte and click Add Members.
|
Press and hold CTRL, click the required analytes and drag and drop them into the Group Members page to add all analytes in one step. |
10.Click the Save ![]() icon on the Groups window toolbar to save the group information.
icon on the Groups window toolbar to save the group information.
11.Note the asterisk * adjacent to Groups window tab disappears, indicating that the data was saved.
|
Objective: Set-up Action Levels |
1.Select Action Levels ![]() from the Edit group of the Home ribbon.
from the Edit group of the Home ribbon.
2.Single-click to highlight an Action Level Type.
For this exercise, highlight the "Irrigation Waters" Action Level Type.
3.From the Action Levels window toolbar, select Add New Type/Code> New Action Level Code.
4.In the Action Level Code Details tab, enter the desired code into Action Level Code.
For this exercise, enter "Short-Term IWs <your initials>" for the Action Level Code.
5.Select the Save button to enable the other fields on the Action Level Code Details tab.
Notice that the new Action Level has been added under Irrigation Waters on the Action Level Type pane.
6.Set the Matrix, Fraction, and other desired parameters. The following table describes some of the other available fields.
For this exercise, set Matrix to WS and Fraction to T.
Field |
Description |
|---|---|
CODE |
Unique identifier for the action level. Will be displayed in the Report list when selecting parameters. |
TYPE |
Type of action level, typically pre-populated by selecting the action level type when creating a new action level. |
FACILITY ID |
Action level will only be available in the specific facility, if populated. (If this field is left blank, the action level will be available across all facilities.) |
SUBFACILITY CODE |
Action level will only be applied to data in the specific subfacility, if populated. (If this field is left blank, the action level will be applied across all subfacilities.) |
PERMIT NUMBER |
Action level will only be applied to data in the specific permit numbers, if populated. (If this field is left blank, the action level will be applied across all permit numbers.) |
MATRIX |
Action level will only be applied to data in the specific matrix, if populated. (If this field is left blank, the action level will be applied across all matrices.) |
FRACTION |
Action level will only be applied to data in the specific fraction, if populated. (If this field is left blank, the action level will be applied across all fractions.) |
START DATE |
Action level will only be applied to data after the specific start date, if populated. (If this field is left blank, the action level will be applied regardless of start date.) |
END DATE |
Action level will only be applied to data before the specific end date, if populated. (If this field is left blank, the action level will be applied regardless of end date.) |
MIN START DEPTH |
Action level will only be applied to data below the specific start depth, if populated. (If this field is left blank, the action level will be applied regardless of start depth.) |
MAX END DEPTH |
Action level will only be applied to data above the specific end depth, if populated. (If this field is left blank, the action level will be applied regardless of end depth.) |
EXCEEDANCE FLAG |
Text symbol (such as "X") used to demarcate if a result exceeds the action level. |
DESCRIPTION |
Description of the action level. |
REMARK |
Any additional remarks or details about the action level. |
7.Click the Save ![]() icon on the Action Levels window toolbar, and then select the Action Level Parameters tab.
icon on the Action Levels window toolbar, and then select the Action Level Parameters tab.
8.Add the desired parameter by dragging the parameters from the Available Parameters list into the Action Level Parameters box and then defining the action levels and any other desired fields.
|
Use Warning Levels to generate flags prior to Action Level exceedances. |
For this exercise, add the following metals and then define the Action Level, Warning Level and Unit as shown in the table. Press and hold the CTRL key to select multiple analytes to be included in the action level list.
Chemical |
Action Level |
Warning Level |
Unit |
|---|---|---|---|
Arsenic |
100 |
85 |
ug/L |
Cadmium |
10 |
9 |
ug/L |
Chromium |
100 |
85 |
ug/L |
Iron |
5000 |
4500 |
ug/L |
Lead |
5000 |
4500 |
ug/L |
|
To assist with setting warning levels, pin the CHEMICAL_NAME to keep it in view while scrolling right to the WARNING_LEVEL field. |
9.Click Save ![]() in the Action Levels window toolbar.
in the Action Levels window toolbar.
10.Note the asterisk * adjacent to Action Level window tab disappears, indicating that the data was saved.