Overview
This exercise will provide the steps to create a new EQuIS database and establish reference values within the database. During the database creation process, the database Schemas must be selected and the Test Alternate Key must be defined.
The Test Alternate Key (also referred to as test-level key or index) consists of the group of fields used to determine record uniqueness in the DT_TEST table for each facility. Prior to setting up an EQuIS database, determine which fields are necessary to uniquely identify each test/analysis. EQuIS requires that the Sample ID and Lab Analytic Method fields are included. Optional fields include: Analysis Date/Time, Fraction, Column Number, and Test Type. As part of the test alternate key, the fields chosen will be required in all data sets. It is typically recommended to choose the minimum number of fields required for uniqueness and to meet data needs.
While it may be possible to change the test alternate key at a later time, it is not advisable. It is best to determine the permanent test alternate keys when the database is created. After the database is populated with data, it is only possible to add or remove fields from the test alternate key if the addition or deletion of fields does not cause a conflict with the existing data. Otherwise, removing a field from the test alternate key after data is entered into the database will create many duplicate entries that must be resolved. Please note that once a test alternate key has been added to the database and new data has been loaded, it may no longer be possible to remove a test alternate key.
|
Create new (empty) EQuIS Databases and start building reference value lists. |
|
Exercise Objectives |
•Create a New EQuIS Database
•Establish Reference Values
Skills, Software and Permissions Required
•EQuIS Professional v6.6 or higher must be installed on the workstation
•.NET Framework 4.0 or higher must be installed on the workstation
•Access to the Standard EQuIS Library (or higher)
•At least DBCreator SQL Server permissions are required to a create new database.
|
Objective: Create a New EQuIS Database |
1.Open the Windows Start menu and choose All Programs or Apps> EarthSoft> EQuIS Professional.
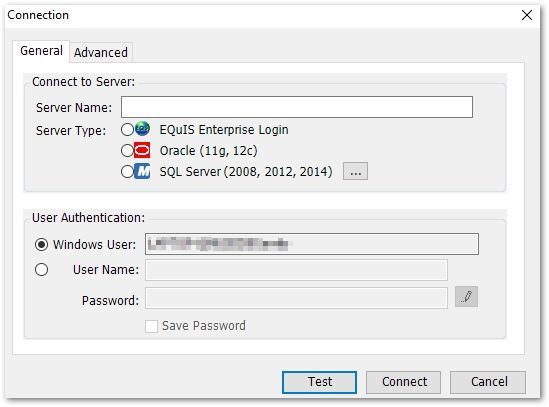
2.If there are no previously saved EQuIS database connections, the Database Connection window will appear. See how to Create an EQuIS Database Connection to complete this step. If a connection to a previously saved EQuIS Database has already been established, proceed to the next step.
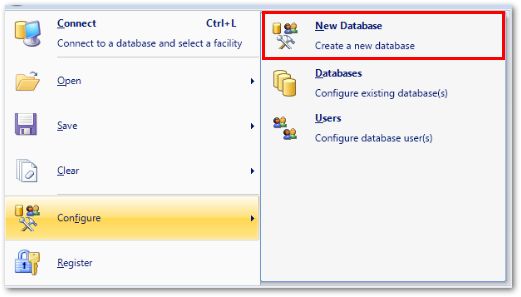
3.To configure a new database, click the application button ![]() to access the main EQuIS menu and then select Configure
to access the main EQuIS menu and then select Configure ![]() and then New Database. Administrative permissions are required to create a new EQuIS database.
and then New Database. Administrative permissions are required to create a new EQuIS database.
4.The Database Properties window will open. On the Database tab, assign the desired Name to the new database.
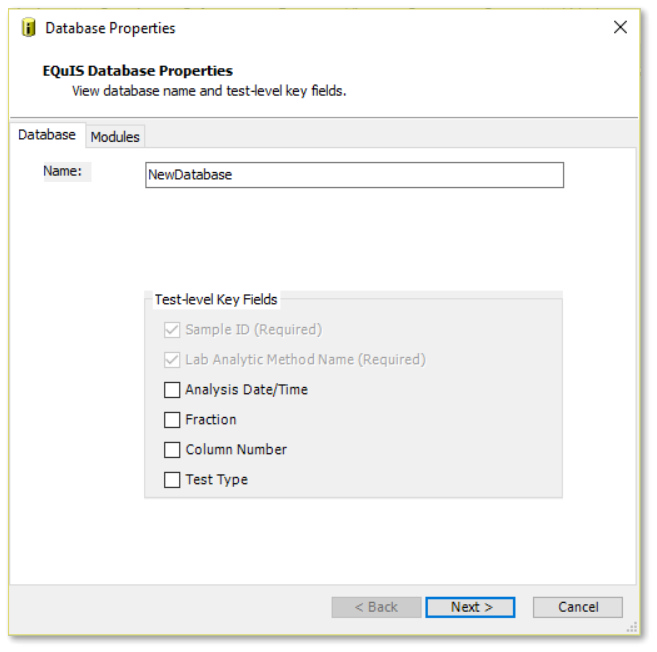
5.Choose the Test-level Key Fields to be applied to the database. By default, the Sample ID and Lab Analytic Method Name will be selected since they are required fields.
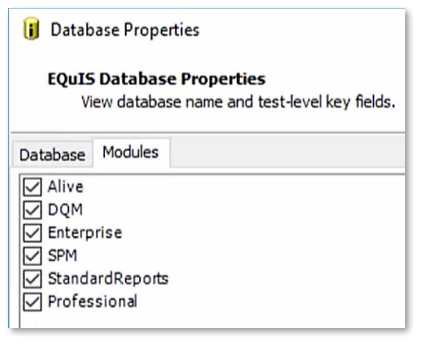
6.Select the Modules tab, and check the Schemas that will be used to create the database. Modules that are not checked will not be included in the new EQuIS database. The standard EQuIS Schemas are "Professional", "Enterprise", and "StandardReports", and must be included with any database. The three Schemas are designed to create a relational database and are dependent on one another. To exclude one or more will result in error. Additional Schemas may be added to the database later if not initially selected during the database creation process.
7.Select the Next button to create the database. A single, default Facility, with the same name as the database, will also be created. This facility may be renamed or deleted later.
|
Alternatively, the EQuIS Enterprise Database Manager can be used to create a new EQuIS Database. See the Online Documentation for additional information. |
|
Objective: Establish Reference Values |
Database vocabulary will be established by adding the reference values. Reference values are stored in Reference Tables, designated with the RT_ prefix. There are two ways to add reference values to EQuIS. When creating a new project, it is easier to use EQuIS Data Processor (EDP) to add new reference values if you are working with a list or spreadsheet. Reference values can be imported into the database using the refvals.xsd EDD format. This method is preferred, and users often obtain *.rvf files from regulatory agencies to get started. Individual reference values can be added manually within Professional. These exercises will explore both options for adding reference values.
Tasks
•Add Reference Values in EQuIS Professional
•Add Reference Values using EDP
Add Reference Values in EQuIS Professional
An individual reference value will be added manually within Professional.
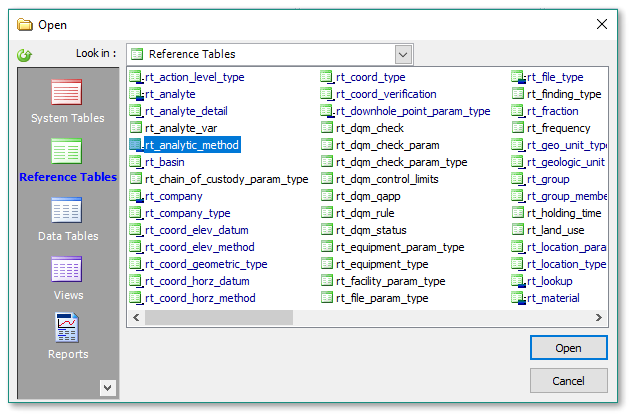
1.Select Reference Tables ![]() from the Open group on the Home ribbon of EQuIS Professional, and open the table to which the reference value will be added.
from the Open group on the Home ribbon of EQuIS Professional, and open the table to which the reference value will be added.
For this exercise, open RT_ANALYTIC_METHOD.
2.Click the Add... button to add a new line to the table.

3.Populate all of the required fields, designated as RED_BOLD, before clicking Save ![]() on the toolbar.
on the toolbar.
For this exercise, enter "EPA 537" in the ANALYTIC_METHOD field and ensure that the STATUS_FLAG is set to "A" to indicate that the value is active.
Add Reference Values using EDP
To load reference values as an EDD, use the refvals.xsd format. This format contains all standard EQuIS reference tables and reflects the table structure as it exists in the database. Each reference table exists as its own section in the format file. To load reference data using the refvals.xsd format file, EDD files containing the new reference values must first be created.
1.Select EDP ![]() in the Import group on the Home ribbon of EQuIS Professional.
in the Import group on the Home ribbon of EQuIS Professional.
2.EQuIS Professional EDP opens in a separate window.
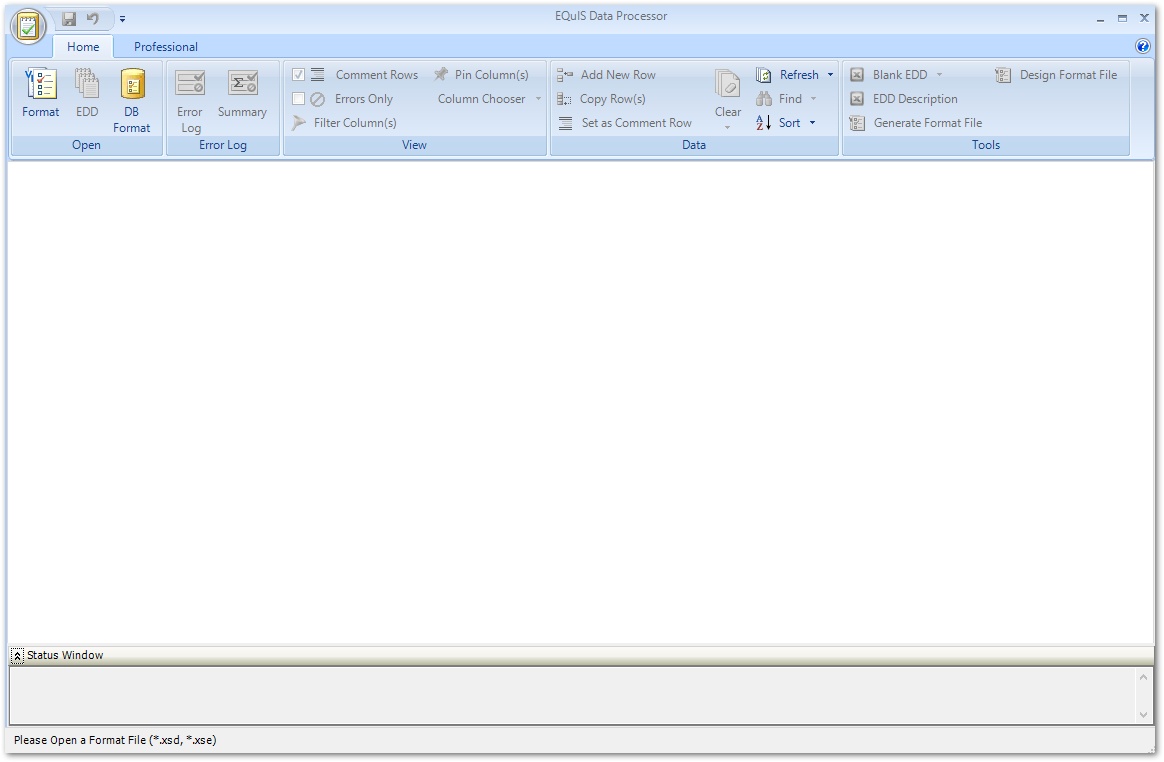
3.Select Format ![]() in the Open group of the EDP Home ribbon.
in the Open group of the EDP Home ribbon.
4.Browse to the desired Format directory and select the refvals.zip Format to open. Standard EarthSoft formats are typically located in the EQuIS install folder, C:\Program Files\EarthSoft\EQuIS\Formats\EarthSoft.
5.Select EDD ![]() in the Open group of the EDP Home ribbon.
in the Open group of the EDP Home ribbon.
6.Browse to the desired EDD file (typically an .xls, .zip, or multiple .txt files) containing the reference values and Open the file.
For this exercise, browse to the "Training Materials> New Project Resources" directory and download and open the "Training_Refvals.xls" file.
|
When creating EDD files, the included values must match the expected values in the appropriate sections of refvals.xsd. When creating EDD files as Microsoft Excel files, the Worksheet name(s) must match the appropriate section name(s) in refvals.xsd. |
7.Select the Professional ribbon and click Create ![]() located in the Package group of the Professional ribbon. A processing window opens. When processing is complete, this window displays a record of how many rows were loaded into the Database Preview tab.
located in the Package group of the Professional ribbon. A processing window opens. When processing is complete, this window displays a record of how many rows were loaded into the Database Preview tab.
8.Click the Finish button if there are no records with a Status of ERROR.
9.Click Commit ![]() in the Package group on the Professional ribbon in EDP.
in the Package group on the Professional ribbon in EDP.
10.Select the appropriate commit type. A processing window appears that contains a record of how many values were loaded into each table within the EQuIS database.
For this exercise, select "Insert and Update" as the commit type.
11.Click the Finish button if there are no records with a Status of ERROR.
12.Verify the reference values were populated by opening the reference tables which were populated in the EDD.
|
For more guidance about checking and loading an EDD format, see Check and Import EDDs. |