Overview
Exercise Scenario
Our quarterly data has been loaded into EQuIS. We want to verify that the data is in the EQuIS database.
|
Learn how to open and navigate in EQuIS Professional. |
|
Exercise Objectives |
•Launch EQuIS Professional
•View Available Facilities and Login to an EQuIS Facility
•Navigate Tables in EQuIS Professional
Optional Exercise
•Add Reference Values to EQuIS
Skills, Software and Permissions Required
•EQuIS Professional v6.6 or higher must be installed on the workstation
•.NET Framework 4.0 or higher must be installed on the workstation
•Read/write permissions are required for the desired facilities
|
Objective: Launch EQuIS Professional |
Tasks
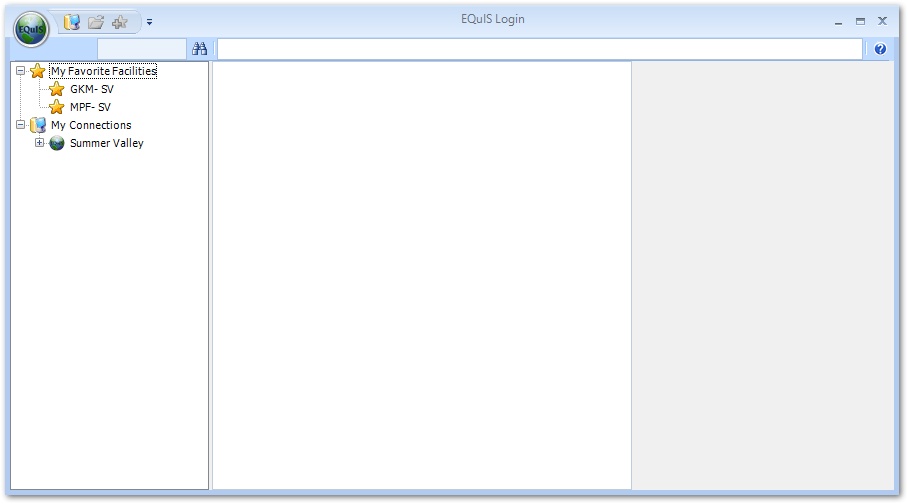
•Open the EQuIS Login Screen
•Create an EQuIS Database Connection
Open the EQuIS Login Screen
1.Open the Windows Start menu and choose All Programs or Apps> EarthSoft> EQuIS Professional.
2.See the Create an EQuIS Database Connection section below if a connection to the EQuIS Training Database has not already been established.
Create an EQuIS Database Connection
Skip this section if a connection to the EQuIS Training Database (or other desired EQuIS database) is already established.
1.Click Database Connection ![]() on the Quick Access Toolbar of the EQuIS Login window. (If there are no previously saved EQuIS database connections, the Database Connection window will appear automatically.)
on the Quick Access Toolbar of the EQuIS Login window. (If there are no previously saved EQuIS database connections, the Database Connection window will appear automatically.)
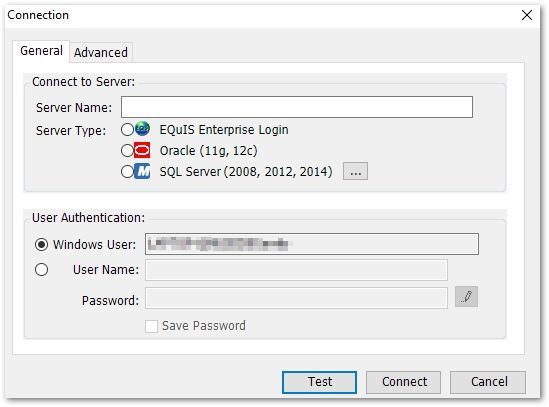
2.On the General tab of the Connection window, enter the Server Name. This is the name or IP address of the server where the EQuIS database resides. If the name is unknown, contact the database administrator or the EarthSoft training department.
3.Select the Server Type.
4.Enter the User Authentication information.
5.Check Save Password to ensure the password will not need to be re-entered.
6.Click the Test button to ensure the connection settings is correct.
7.If everything is correct, click the OK button to the connection succeeded message.
8.Select the Connect button to return to the EQuIS Login screen.
|
Objective: View Available Databases and Facilities |
1.Expand the My Connections node in the EQuIS Login window to expand the list of available connections.
2.Navigate to the EQuIS database and then find the desired facility, expanding folders (Facility Groups) if needed. View the available License Libraries on the right-hand side of the Login window.
For this exercise, expand the Training Database and then the North America folder.
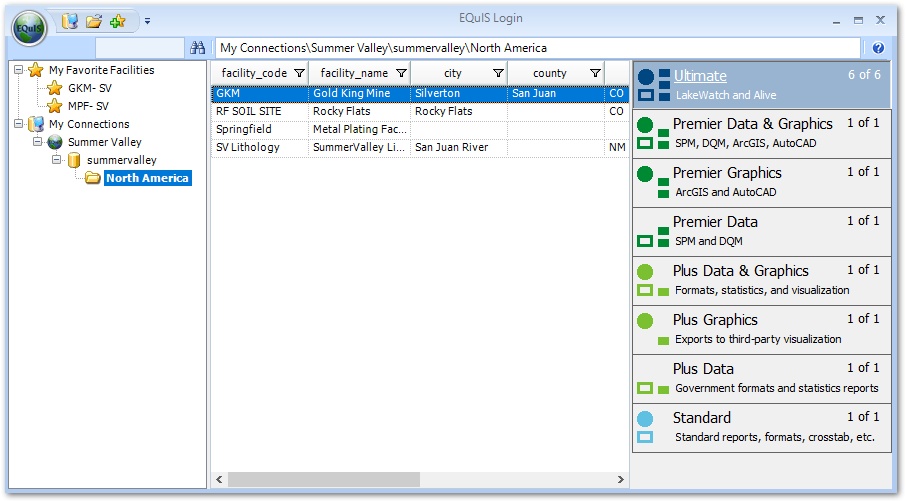
3.Single-click the Facility name from the facility list that appears and double-click on the desired License Library to login to the facility.
For this exercise, select the Gold King Mine facility and the Ultimate license.
|
Since the Gold King Mine facility will be used for many of the training exercises, flagging it as a favorite will allow easy access for future exercises. To set a facility as a favorite, right click on the facility while highlighted and then select Add to Favorite Facilities. |
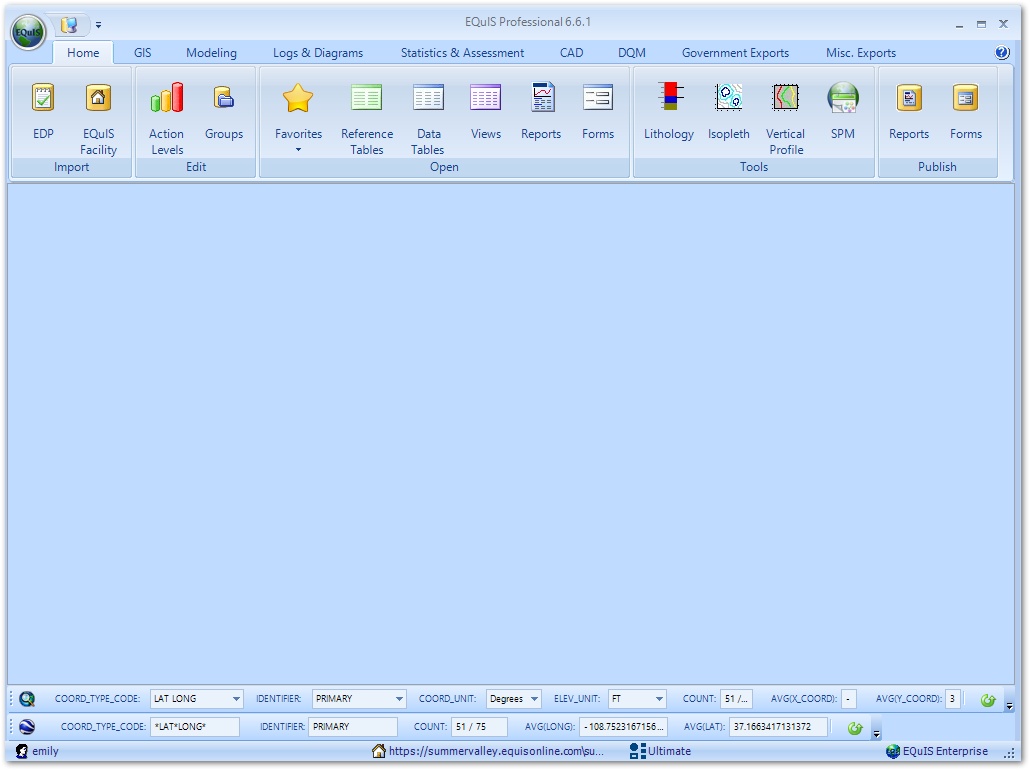
4.The main EQuIS Professional window opens showing the Home ribbon. Note the status bar at the bottom of the EQuIS Application window includes the user name, facility, selected license library and connection type.
|
Objective: Navigate Tables in EQuIS Professional |
View "raw data" as it appears in the populated tables in EQuIS Professional. Several tools are available that assist in viewing raw data.
Tasks
•Open EQuIS Tables
•Filter Columns
•Pin Columns
•Choose Columns
•Find and Replace Values
•Add Related Tables
Open EQuIS Tables
1.Select Data Tables ![]() from the Home ribbon.
from the Home ribbon.
2.Double-click on the DT_SAMPLE table.
3.Review the tools used to view data in the Data and Reference Tables in EQuIS Professional, including:
•Filter ![]()
•Pin Column ![]()
•Column Chooser ![]()
•Find/Replace ![]()
•Related Tables
Filter Columns
Filter any column by any value within that column with the Filter ![]() option. By default, a filter search box appears below each column header in the grid view. If the field is numeric, then the filter operator appears as "=". If the field is text, then the filter operator appears as "A".
option. By default, a filter search box appears below each column header in the grid view. If the field is numeric, then the filter operator appears as "=". If the field is text, then the filter operator appears as "A".

1.Select the desired parameter for filtering and then select the drop-down arrow in the column to enter the desired filter value.
For this exercise, we need to verify that our most recent sample data has been successfully loaded into the Gold King Mine facility. Therefore, select the SAMPLE_DATE column. Do not enter a specific filter value as we will apply a logic statement filter in the next step.
2.To filter by logic statements, select the “A” or the "=" to the left of the drop-down option to select a desired logic statement for filtering. An example logic statement is “Contains”, which filters for a result based on a value within the string.
For this exercise, select the "=" and change the filter operator in the column to Greater Than. Type "10/14/2015" in the filter row. Note that only some of the records are now visible; only records higher than the entered date.
3.To remove the filter, click on the Remove Filter ![]() icon. This icon is located beside the drop-down arrow for the filter. All data will appear in the grid view.
icon. This icon is located beside the drop-down arrow for the filter. All data will appear in the grid view.
|
To remove all filters, click on the Remove Filter |
Pin Columns
Hold any pinned column to the left-hand side of the table's grid view with the Pin Column ![]() , making viewing data easier.
, making viewing data easier.
1.Click the Pin Column ![]() icon on the DT_SAMPLE toolbar. Once activated, each column header includes a horizontal pushpin.
icon on the DT_SAMPLE toolbar. Once activated, each column header includes a horizontal pushpin.
![]()
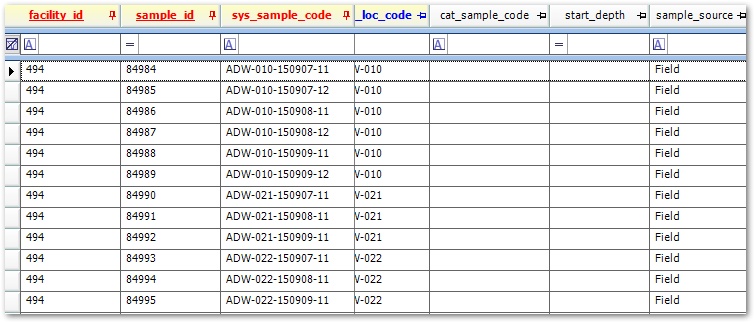
2.Click the pushpin next to the desired column title to pin that column. For example, pin FACILITY_ID, SAMPLE_ID and SYS_SAMPLE_CODE.
3.Notice the pin changes position from horizontal to vertical. Scroll to the right and view the pinned columns now anchored on the left side of the data table.
4.To unpin columns, select the vertical pushpin displayed in the column title next to the column header. Notice how the column locations adjust to keep the pinned column(s) to the left. To unpin all columns, click the Pin Column ![]() icon again.
icon again.
Choose Columns
Determine which columns to make visible and which to hide with the the Column Chooser ![]() icon.
icon.
1.Click the Column Chooser ![]() icon on the DT_SAMPLE toolbar.
icon on the DT_SAMPLE toolbar.
2.Select Hide Blanks. This will hide all columns that do not contain data within the table.
Find and Replace Values
Search for one or all instances of a text string with the Find ![]() icon. Similar to word processing applications, the option to replace values is also available.
icon. Similar to word processing applications, the option to replace values is also available.
|
When selecting the Replace All function, it replaces all instances of a string. For example when changing N to T in the fraction column by selecting Replace All, the tool locates and replaces every instance of N in the data table, even if it occurs outside the fraction column. Use this tool with caution. |
1.Click the Find ![]() icon on the DT_SAMPLE toolbar. A new window displays with text input boxes as well as other options.
icon on the DT_SAMPLE toolbar. A new window displays with text input boxes as well as other options.
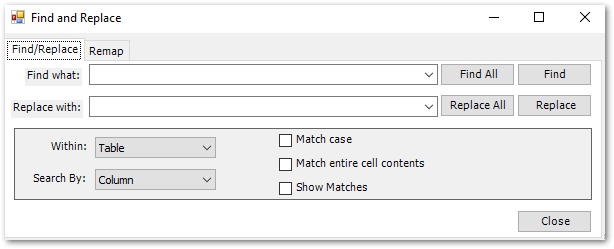
2.Select the desired parameters and then select Find All.
For this exercise, enter "ADW-010" in the Find what: box.
3.Note that only results with a cell containing the specified parameters are highlighted.
4.Select the Close button to return to the Grid View.
Add Related Tables
Open parent and/or child tables as sub-records of the current table with the Related Tables tool.
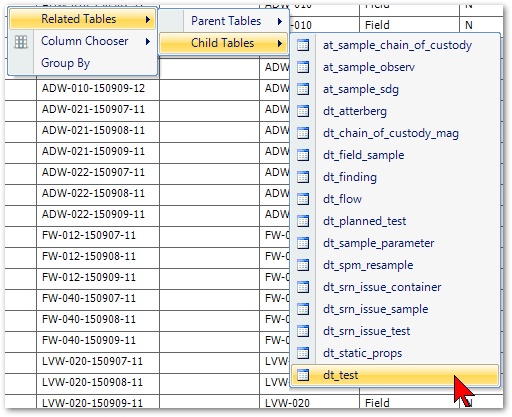
1.In the DT_SAMPLE table, right click anywhere in the header of the grid, and select Related Tables from the pop-up menu.
2.Highlight this menu and navigate to Child Tables> desired child table.
For this exercise, select DT_TEST.
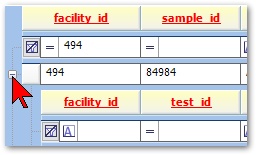
3.Note at the bottom of the EQuIS Professional window, the child table is displayed, along with the parent table.
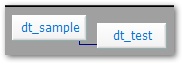
4.Click the "+" node to the left of a row to expand the related table.
|
It is possible to add multiple tables. There is no limit to the number of parent/child tables that can be displayed in one tabular view. |
5.From the Workspace in the left-hand pane of the Professional window, right-click on DT_SAMPLE.
6.Select Remove Item.
7.When prompted, select the Yes button to remove the open tables from the Workspace.
|
Optional Exercise: Add Reference Values to EQuIS |
The reference values used to load data into EQuIS Professional EDP come directly from the EQuIS database. Recall that each EQuIS database has only one set of reference values for all of the facilities in that database. Add new reference values to the EQuIS database by using the right-click menu within EQuIS Professional EDP or by adding them into the appropriate table in the database.
|
This exercise is recommended for EQuIS Power Users and should only be used with permission from the Database Administrator to add reference values to the EQuIS database. |
1.Select Reference Tables ![]() from the Open group on the Home ribbon in EQuIS Professional.
from the Open group on the Home ribbon in EQuIS Professional.
2.Highlight the appropriate table and select the Open button.
3.If the value is present, but has a STATUS_FLAG set to R, change the STATUS_FLAG to A.
4.If the value is not present, select Add... from the bottom of the table and populate the new record as desired.
5.Click Save ![]() in the Reference Table toolbar.
in the Reference Table toolbar.