Overview
Within EQuIS Enterprise, roles are configurable to allow different levels of access to the application and the data maintained in the EQuIS database. The Role Manager widget can be used to create roles for groups of users, and the User Manager widget can be used to create new EQuIS Enterprise users and then assign roles or user-specific permissions to users.
Permissons
There are four types of permissions that control how a particular user may interact with particular Object Types (e.g., dashboards, facilities, and reports) and individual Objects (e.g., an administration dashboard, a specific facility, specific reports): Owner, Editor, Viewer, Creator.
•![]() Owner – An owner of an individual object has all permissions on that object, including the ability to edit the object (i.e., editor), view the object (i.e., viewer), delete the object (requires Professional access depending on object type), and share the object (grant permissions to other users on that object; requires administrator to access this functionality in Enterprise). An object may have multiple owners. A user that creates an object is assigned as an owner of that object (but that permission may later be changed or removed by an administrator).
Owner – An owner of an individual object has all permissions on that object, including the ability to edit the object (i.e., editor), view the object (i.e., viewer), delete the object (requires Professional access depending on object type), and share the object (grant permissions to other users on that object; requires administrator to access this functionality in Enterprise). An object may have multiple owners. A user that creates an object is assigned as an owner of that object (but that permission may later be changed or removed by an administrator).
•![]() Editor – An editor of individual objects may edit and view the object. Editing an object may include changing the properties of an object (e.g., changing report parameters). An editor may not delete an object nor share the object. An object may have multiple editors.
Editor – An editor of individual objects may edit and view the object. Editing an object may include changing the properties of an object (e.g., changing report parameters). An editor may not delete an object nor share the object. An object may have multiple editors.
•![]() Viewer – A viewer of individual objects may view or use the object, such as viewing a dashboard or downloading a report. A viewer may not edit, delete, or share the object.
Viewer – A viewer of individual objects may view or use the object, such as viewing a dashboard or downloading a report. A viewer may not edit, delete, or share the object.
•![]() Creator – Creator is a special permission granted on object types that applies to the action of creating an object. For example, a user with creator permission on dashboards may create new dashboards. When the user creates a new dashboard, then he/she is automatically given the owner permission on that specific dashboard. However, he/she does not have creator permission on that dashboard, as the creator permission applies only to the action of creating dashboards. This permission does not apply to specific individual objects that have already been created.
Creator – Creator is a special permission granted on object types that applies to the action of creating an object. For example, a user with creator permission on dashboards may create new dashboards. When the user creates a new dashboard, then he/she is automatically given the owner permission on that specific dashboard. However, he/she does not have creator permission on that dashboard, as the creator permission applies only to the action of creating dashboards. This permission does not apply to specific individual objects that have already been created.
As indicated above, owner is inclusive of editor and viewer, and editor is inclusive of viewer. However, none of the other permissions is inclusive of creator, nor is creator inclusive of any other permission.
Role Manager Widget
Administrators may use the Role Manager widget to view, modify or create application roles. This widget displays a grid listing roles that exist in the system (aka, the ST_ROLE table) and contains attributes of the role. The widget has the following five columns:
•Role Icon – This column is for display purposes only and may not be changed. The column indicates a role •Name – Displays the name of the role. This value must be unique (within the ST_ROLE table). Click the role name to open the Role Profile Editor window for that role. •Assigned – Indicates the number of users assigned to the corresponding role. •Allowed – Indicates the maximum number of users allowed to be assigned to this role. This is particularly useful for license roles. •Available – Indicates the availability to assign further users. |
|
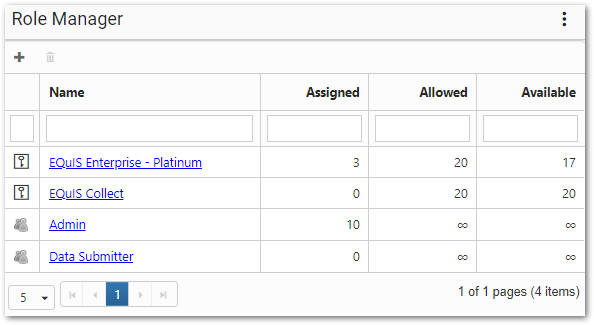
The New Role ![]() button is used to create a new role. The button displays the Role Profile Editor where the administrator may enter attributes of the role, assign role members, permissions, etc.
button is used to create a new role. The button displays the Role Profile Editor where the administrator may enter attributes of the role, assign role members, permissions, etc.
The bottom of the grid contains controls for displaying a limited number of roles (i.e., paging).
The Role Manager widget has no specific properties that can be modified other than the widget title and color.
User Manager Widget
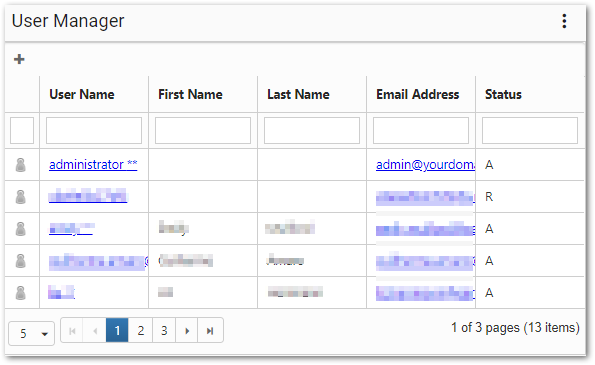
Administrators may use the User Manager widget to view, modify, or create users. This widget is only available to administrators. Even if a non-administrator is granted permission to use this widget, the widget will be empty/blank for non-administrators. This widget displays a grid listing users that exist in the system (aka, the ST_USER table).
The User Manager widget is divided into sections, as depicted in the image below:
•The New User •The grid columns contain attributes of each user, including the user icon •The bottom of the grid contains controls for displaying a limited number of roles at a time (i.e., paging). |
|
The User Manager widget has no specific properties that can be modified other than the widget title and color.
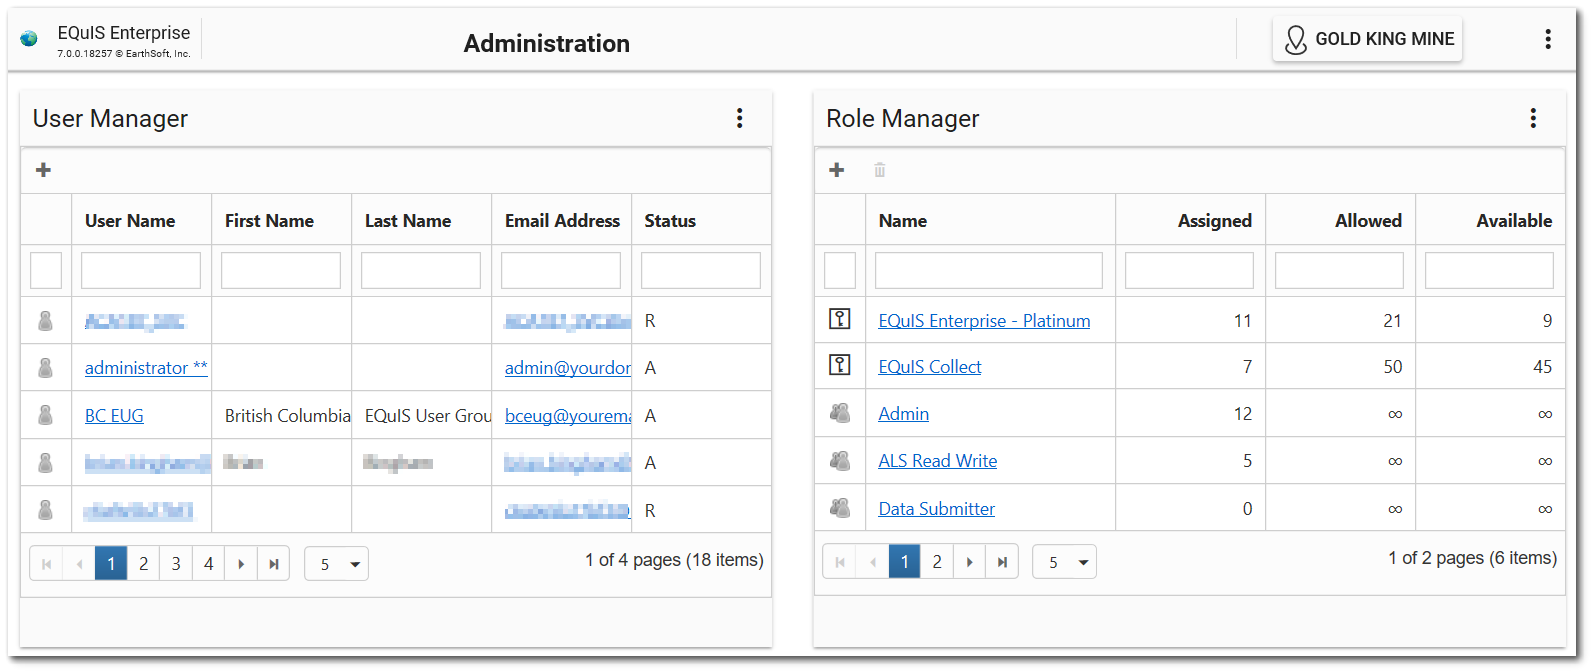
Exercise Scenario
As the Administrator for the Gold King Mine project, we need to be able to add new users and create the necessary permissions and roles.
|
Learn about permissions, how to create and assign roles, and how to create users and then assign user permissions and roles. |
|
Exercise Objectives |
•Create Roles with the Role Manager Widget
•Create New Users with the User Manager Widget
Skills, Software and Permissions Required
•Google Chrome, Mozilla Firefox, or Microsoft Edge
•Permissions to the Admin role, which gives Owner and Creator permissions to all object types.
|
Objective: Create Roles with the Role Manager Widget |
1.Select More Options ![]() on the right-side of the dashboard header to open a drop-down menu. Click
on the right-side of the dashboard header to open a drop-down menu. Click ![]() Choose Dashboard from the drop-down options to open the Dashboard Chooser.
Choose Dashboard from the drop-down options to open the Dashboard Chooser.
2.Select the Administration dashboard (or any preferred dashboard that contains the Role Manager widget).
3.On the Role Manager widget, select the New Role ![]() button to open the Role Profile screen and create a new role.
button to open the Role Profile screen and create a new role.
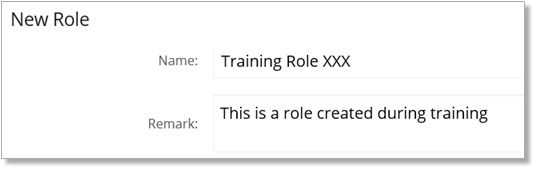
4.Enter the desired Name of the role and a Remark as desired.
For this exercise, enter "Training Role <your initials>" in the Name box and "This is a role created during training" in the Remark box.
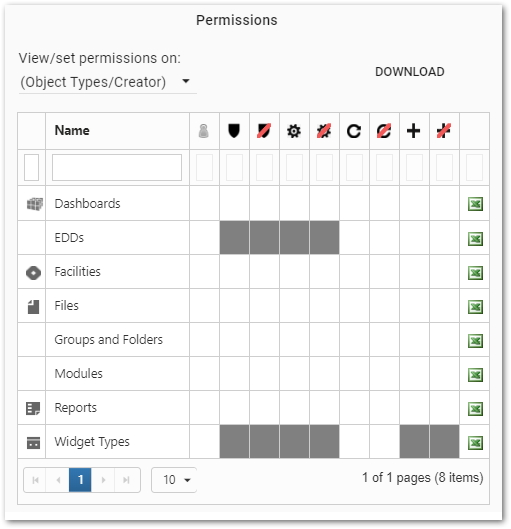
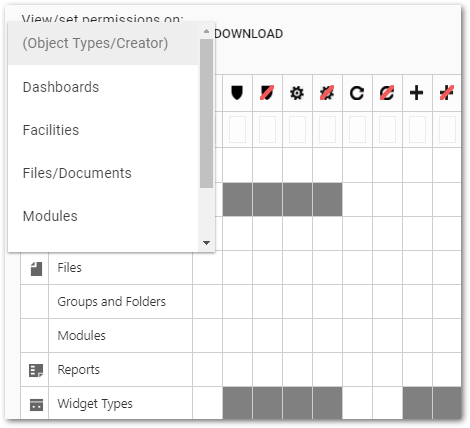
5.Under the Permissions grid on the bottom right, select the View/set permissions on drop-down list as desired to change the items displayed in the grid below.
•(Object Types/Creator): Select this option to view/set permissions on all objects by type (including Creator permission). Permissions granted to the object type apply to all current and future objects of that type.
•Dashboards: Select this option to view/set permissions on existing dashboards.
•Facilities: Select this option to view/set permissions on existing facilities.
•Files/Documents: Select this option to view/set permissions on existing files/documents.
•Reports: Select this option to view/set permissions on existing reports.
•Widgets: Select this option to view/set permissions on existing widget types.
|
Unlike permissions assigned to Object Types/Creator, permissions assigned to specific objects apply only to that specific object, and have no effect on other existing or future objects. |
For this exercise, select the Object Types/Creator option from the drop-down menu.
6.Under the Permissions grid, review the permissions that can be assigned to each object or object type: ![]() Owner Grant,
Owner Grant, ![]() Owner Deny,
Owner Deny, ![]() Editor Grant,
Editor Grant, ![]() Editor Deny,
Editor Deny, ![]() Viewer Grant,
Viewer Grant, ![]() Viewer Deny,
Viewer Deny, ![]() Creator Grant, and
Creator Grant, and ![]() Creator Deny. If a permission does not apply to an object type, the cell is gray.
Creator Deny. If a permission does not apply to an object type, the cell is gray.
Denying a permission means that the user is completely denied permission to that object, regardless of any other permissions that may be inherited. Denying a higher permission, such as owner, does not necessarily deny a lower permission, such as viewer. If the user is both granted and denied the same permission, the deny takes precedence (i.e., the permission will be denied).
Un-granting a permission (by toggling that permission column to off) means that the user is not specifically granted permission to that object. However, the user is also not prevented from inheriting that permission from elsewhere.
|
The creator grant and deny columns are only visible if the viewing permissions are Object Types/Creator. Creator permissions cannot be granted or denied on a specific object (e.g., GKM facility), but only on object types (e.g., facilities). |
7.Choose the desired permissions for the new role.
For this exercise, select Owner and Creator for all the Object Types.
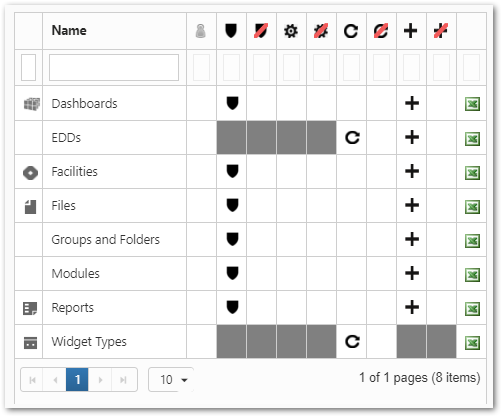
8.Select the Save button and note that the Role Manager widget now displays the new role.
|
Objective: Create New Users with the User Manager Widget |
Use this widget to view, modify, or create users and assign roles and user-specific permissions. This widget is only available to administrators. Users may have permissions that have been explicitly granted (or denied), inherited from a role to which that user has been assigned, or inherited from an object type.
1.On the User Manager widget, select the New User ![]() button from left corner of the top frame to open the New User Profile screen and create a new user.
button from left corner of the top frame to open the New User Profile screen and create a new user.
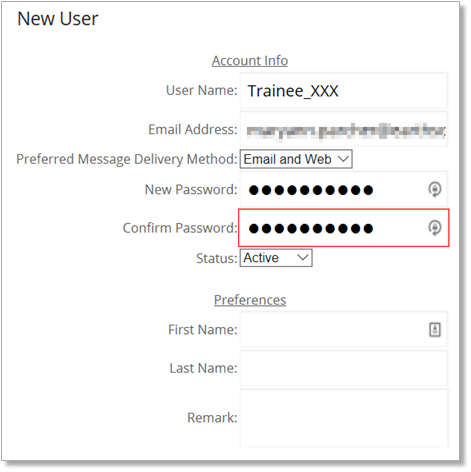
2.Under Account Info, enter the User Name, Email Address and Password. Ensure the Status is Active.
For this exercise, enter "Trainee_<your initials>" in the User Name box and add an email address and password.
3.Fill in the Preferences, as desired, beneath the already completed Account Info. Although this information is optional, assigning a first and last name provide added clarity for EQuIS database administration.
4.From the Roles pane, single-click on the far-right column (![]() ) to assign any roles to which that user should be a member. The user icon
) to assign any roles to which that user should be a member. The user icon ![]() will appear for the selected role. Users automatically have all permissions from the role(s) chosen.
will appear for the selected role. Users automatically have all permissions from the role(s) chosen.
For this exercise, assign the Training Role <your initials> to the new user.
5.Check the Show/hide User Permissions box to make additional selections in the Permissions grid to Grant or Deny other user-specific permissions to the user.
6.Select the Save button and note that the User Manager widget now displays the new user.